Wednesday, July 9, 2014

Installing Windows 2012 Core as additional Domain Controller into Existing Forest/Domain. Sconfig is your Friend.


After finishing window 2012 server install , and logging into server all we get is  plain command prompt. If you are tasked to promote this newly installed  Core Server to be the additional domain controller you can use Sconfig to get the mission accomplish.

Type “Sconfig” and hit enter

image

image

Now first thing we will do is to rename the server

Option # 1

image


image

we will say no to this one for now, we will set the IP Address

Option # 8

image

Type the index number shown on the menu for the adapter you wish to configure

image

Option # 1

and select Static ( S )

image

as you can see the new configured IP is showing up next to 169.254.1.121

Now we need to take care of  DNS IP Addresses

Option # 2

image

image

image

Option # 4 return the Main Menu

image

Enable RDP Option # 7

image

and now I am going to re-start the server

image

After I login I made sure I can ping my existing DC/GC/DNS Server

image

Firing up SConfig one more time to add the server into existing domain as member server

image

image

Now server is part of the domain and ready to be promoted as additional domain controller

I make sure to log back into domain

image

Now lets fire-up PowerShell

image

image

Fire-up Sconfig  one more time to make sure I have the correct, desired configuration settings.

image


Install-WindowsFeature -Name Ad-Domain-Services | Install-WindowsFeature

image

Type notepad.exe on the PS and hit enter

image

Copy and paste below code into notepad.

Core.ps1 ( You need to change the desired filed in the PS script , such as domain name

I have used “-DomainName "ZtekZone.com" change this to suit to your scenario. Once you are done, on the notepad click file and save as , and save the file on the C:\temp directory as “CoreDeploy.ps1”

image 

You can download the script from here

image


#Installing Domain Controller

Write-Host "................................"

Write-Host "Please modify pre defined Script "

Write-Host "To Make sure it fits into your Environment"

Write-Host "................................"

Import-Module ADDSDeployment

Install-ADDSDomainController `

-NoGlobalCatalog:$false `

-CreateDnsDelegation:$false `

-CriticalReplicationOnly:$false `

# Change the DatabasePath if desired

-DatabasePath "C:\Windows\NTDS" `

# Change the Domain name if desired

-DomainName "ZtekZone.com"

-InstallDns:$true `

# Change the LogPath if desired

-LogPath "C:\Windows\NTDS" `

-NoRebootOnCompletion:$false `

# Change the AD Site Name if necessary

-SiteName "Default-First-Site-Name" `

# Change the SYSVOL if necessary.

-SysvolPath "C:\Windows\SYSVOL" `

-Force:$true

Now within the PS , change the directory to C:\temp directory

image


Type “CoreDeploy.ps1”

image


image

ZtekZone.com ( is the domain name in my case)

image

image

After server reboots , you need to make sure replication is working etc.

here is AD site and services with the newly promoted server

image

Respectfully,
Oz Casey, Dedeal ( MVP north America)
MCITP (EMA), MCITP (SA)
MCSE 2003, M+, S+, MCDST
Security+, Project +, Server +
http://smtp25.blogspot.com/ (Blog)
http://telnet25.wordpress.com/ (Blog)

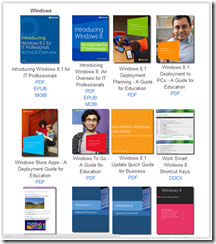
Largest collection of FREE Microsoft eBooks ever, including: Windows 8.1, Windows 8,PowerShell, Exchange Server, Lync 2013, System Center, Azure, Cloud, SQL Server


MS has large e-book offerings , click here to get them


image

Respectfully,
Oz Casey, Dedeal ( MVP north America)
MCITP (EMA), MCITP (SA)
MCSE 2003, M+, S+, MCDST
Security+, Project +, Server +
http://smtp25.blogspot.com/ (Blog)
http://telnet25.wordpress.com/ (Blog)

Monday, July 7, 2014

Installing First Windows 2012 Domain Controller into Existing Forest/Domain via PowerShell


Task: Introducing first Windows 2012 domain controller into Existing Forest /Domain. As you already  notices with Windows 2012 , promoting server to be additional domain controller is changed a lot. There is no more DCpromo instead we use GUI or PowerShell to get the work done.

High Level Steps :

  • Install Windows 2012 Server
  • Configure , Server name, IP address
  • Add Server into existing domain as member server ( preferred )
  • Use PS to promote the server to be additional domain controller and modify the DCpromo.ps1 Script

Step# 1

First task is to add the windows 2012 server into existing domain. Adding server into existing domain  before promoting to be domain controller is a good old habit ,  which allows A record to be created  within the existing DNS Forward lookup  zone and helps also ensures correct DNS settings has been configured.

Log into Server

Open PowerShell and type following command.

Install-WindowsFeature -Name Ad-Domain-Services | Install-WindowsFeature

clip_image001

Step# 2

Now copy and paste the , below PowerShell command into notepad , and save it as DCpromo.ps1 ( we use this name to honor DCPromo we have used ages (-:   , you can name it anything you like.

image

You will need to change  “-DomainName "ZtekZone.com"  and if you like any additional customization , such as changing the defaults , SYSLOG, DatabasePath, LogPath etc.

Download the script from here

Run PS Command against pre-defied PS Script

#Installing Domain Controller

Write-Host "................................"

Write-Host "Please modify pre defined Script "

Write-Host "To Make sure it fits into your Environment"

Write-Host "................................"

Import-Module ADDSDeployment

Install-ADDSDomainController `

-NoGlobalCatalog:$false `

-CreateDnsDelegation:$false `

-CriticalReplicationOnly:$false `

# Change the DatabasePath if desired

-DatabasePath "C:\Windows\NTDS" `

# Change the Domain name if desired

-DomainName "ZtekZone.com"

-InstallDns:$true `

# Change the LogPath if desired

-LogPath "C:\Windows\NTDS" `

-NoRebootOnCompletion:$false `

# Change the AD Site Name if necessary

-SiteName "Default-First-Site-Name" `

# Change the SYSVOL if necessary.

-SysvolPath "C:\Windows\SYSVOL" `

-Force:$true

Now after modifying the script save it onto server into temp Directory

image

From PowerShell Run it

clip_image002

clip_image003

clip_image004

After server reboot if we open Site and Services we will see the additional domain controller

clip_image005

Now couple additional Configuration we will perform on the new domain controller

Add-WindowsFeature RSAT-AD-PowerShell, RSAT-AD-AdminCenter

clip_image006

Now you can open ADAC from GUI

clip_image007

Or you can open it from PowerShell

clip_image008

clip_image009

You can also open Site and Services

dssite.msc

clip_image010

You can open ADUC

Dsa.msc

clip_image011

More to read… AD Team

http://blogs.technet.com/b/askpfeplat/archive/2012/09/06/introducing-the-first-windows-server-2012-domain-controller-part-2-of-2.aspx

Respectfully,
Oz Casey, Dedeal ( MVP north America)
MCITP (EMA), MCITP (SA)
MCSE 2003, M+, S+, MCDST
Security+, Project +, Server +
http://smtp25.blogspot.com/ (Blog)
http://telnet25.wordpress.com/ (Blog)

Wednesday, June 11, 2014

Configuring Servers with /32 Subnet Mask

There are times specific IP address explicitly needs to be added into Active Directory site and services to ensure the application or the servers is talking to specific domain controllers for certain task such as authentication, Global catalog selection etc. Very recent ExRAP program I have worked , indicated some of the Exchange servers were talking to domain controllers out of its own AD SITE. As you may already know Exchange servers will select DC/GC from their own AD Site and if they cannot reach them out they will try to communicate other available domain controller ( DC/GC) the magic lays down on how TCP/IP settings configured on the client as well as AD Site and services , subnets.

In this example we will add Exchange server IP Addresses is  10.10.10.121 /24

On  the domain controller we will open Site and Services snap in

DSSite.msc 

image

Click Subnets , new subnet , type the IP address and Subnet mask and select the corresponding ( desired)  AD Site.Once finish you can make right click on Site and make sure the IP address is added on the properties.


image

image


By doing this simple task, we made sure the very specific IP address and its subnet mask is added to AD Site we choose.

Best regards,
Oz Casey , Dedeal
MCITP (EMA), MCITP (SA)
MCSE 2003, M+, S+, MCDST
Security+, Project +, Server +
Http://smtp25.blogspot.com (Blog)
Http://telnet25.wordpress.com (Blog)